

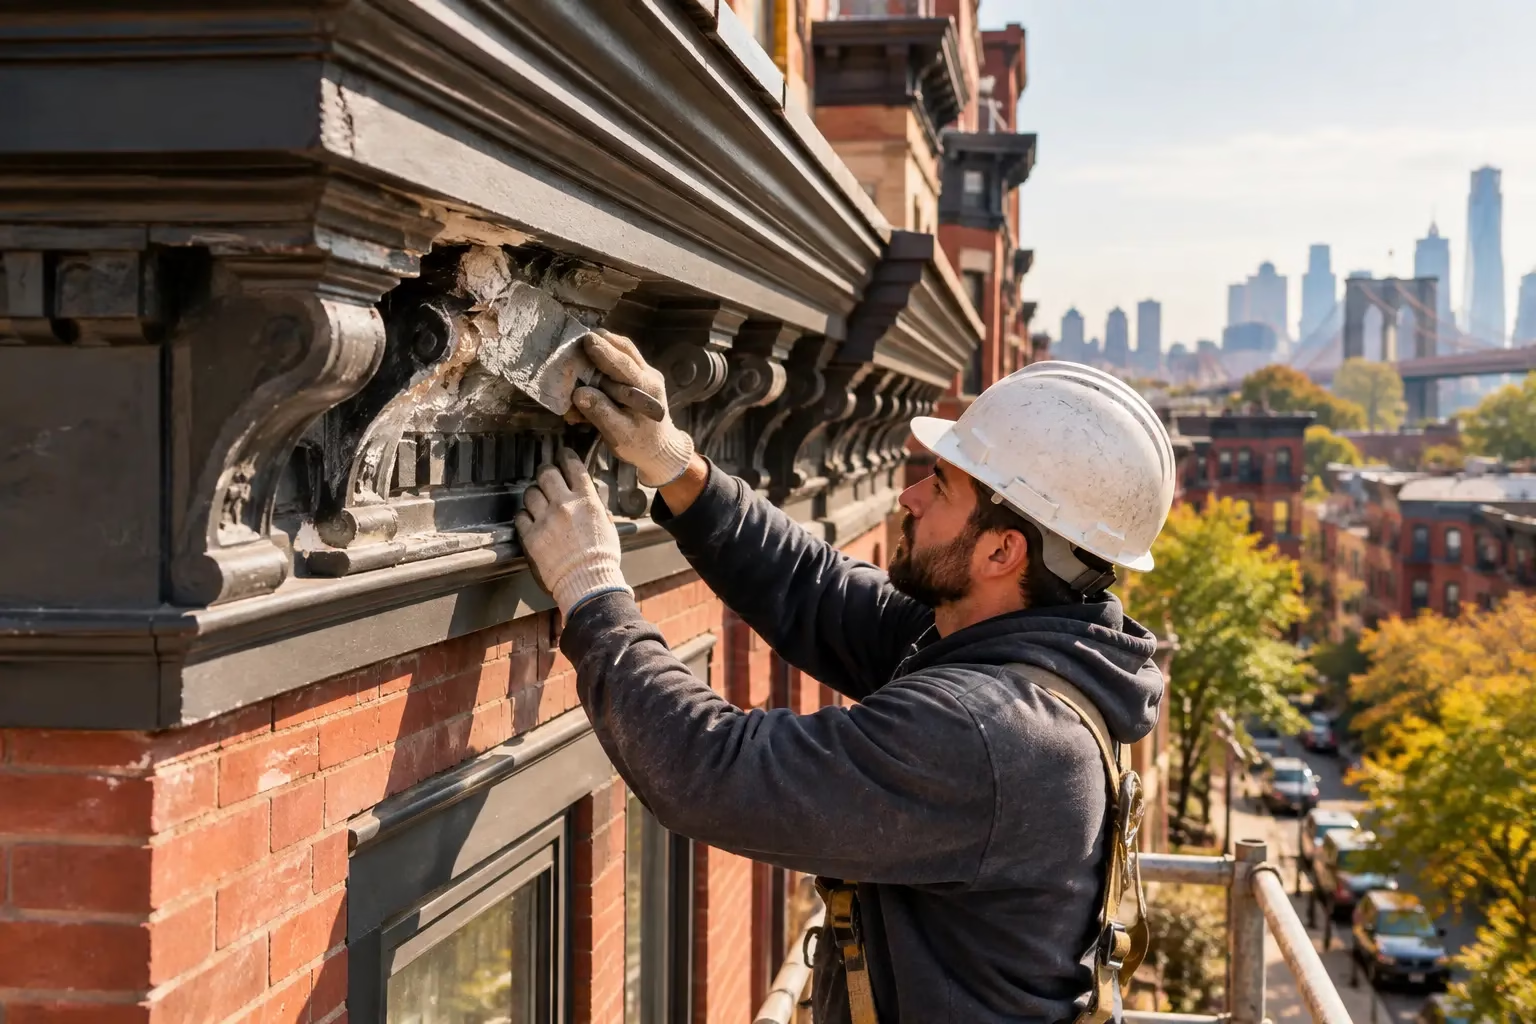
A cornice is easy to ignore until pieces begin falling onto the sidewalk, water starts entering the top-floor ceiling, or a building inspector flags the facade. On Brooklyn brownstones and older NYC brick buildings, damaged cornices are more than a cosmetic problem. They can expose masonry, wood framing, and roof edges to water while creating a serious public-safety risk.
Knowing how to fix damaged cornice starts with identifying what has failed and why. A small cracked section may be repairable. A loose, rotted, or badly deteriorated cornice may need partial reconstruction or full replacement. The right answer depends on the material, the extent of the damage, and the condition of the roof and facade behind it.
Why damaged cornices need prompt attention
An exterior cornice is the projecting trim at the top of a building facade, often found just below the roofline. On historic properties, it may be built from sheet metal, galvanized steel, wood, terra cotta, limestone, cast stone, or a combination of materials. Its job is partly decorative, but it also directs water away from the wall below.
When the cornice cracks, pulls away, rusts through, or loses sections, rainwater can enter areas that were meant to stay protected. Water may travel behind the facade, soak wooden blocking, corrode metal anchors, loosen brickwork, and cause interior leaks. In freezing weather, trapped water expands and can turn a small crack into a larger failure.
For landlords, co-op boards, and commercial property owners, loose cornice material also creates liability. A piece falling from a second-story building is dangerous. A piece falling from a five-story facade can be life-threatening. If you see movement, missing pieces, exposed framing, or debris below the roofline, keep people away from the area and arrange a professional inspection right away.
How to fix damaged cornice: start with an honest assessment
The repair process should begin from the ground and roof, not from a ladder leaned against the facade. A licensed, insured contractor can inspect the cornice safely using proper access equipment and determine whether the visible damage is only the surface of a larger issue.
A thorough inspection checks the cornice itself, its fasteners and supports, the parapet wall, flashing, gutters or scuppers, and the roof edge. The goal is to find the source of moisture, not simply cover over the damage. Patching a cracked metal face without correcting failed flashing above it usually means the same repair will fail again.
Look for warning signs such as rust stains running down brick, open seams, split or peeling paint, sagging sections, crumbling decorative work, cracked mortar near the roofline, and water stains on top-floor walls or ceilings. These signs do not always mean replacement is required, but they do mean the condition should be evaluated before it worsens.
Determine the cornice material
The material determines the repair method and the budget. Sheet-metal cornices common on rowhouses may be patched, re-secured, or rebuilt in matching sections. Wood cornices can sometimes be repaired with replacement trim and rot-resistant materials, but extensive rot often means opening the assembly and replacing compromised framing.
Masonry, cast-stone, and terra-cotta cornices need different treatment. Minor cracks may be repaired with compatible restoration mortar or an appropriate patching compound. Larger fractures, missing profiles, and failed anchors may require custom-made replacement units and structural attachment work. On landmarked or historically sensitive buildings, the replacement profile and finish may need to closely match the original appearance.
Separate surface damage from structural damage
Paint failure, minor rust, and small open joints are surface conditions. They can often be addressed through cleaning, preparation, priming, sealing, and painting once the substrate is sound.
Structural damage is different. If a cornice has pulled away from the wall, the support brackets are corroded, the wood behind it is soft, or masonry has shifted, cosmetic work is not a repair. The damaged sections must be stabilized, removed as needed, and rebuilt on secure backing. This is where experienced facade, roofing, and masonry work needs to come together.
Common cornice repair methods
A practical repair plan is based on the least invasive solution that will safely last. That may mean a targeted repair, but it should never mean leaving a weakened section in place because it is cheaper today.
For metal cornices, contractors typically remove loose paint and rust, cut out severely rusted sections, install properly formed replacement metal, and seal all joints. The metal must be correctly fastened to sound backing, with flashing integrated at the roofline. After preparation, a quality metal primer and exterior coating help protect the work from future corrosion.
For wood cornices, the damaged trim, fascia, and backing are opened up to locate rot. Sound material can remain, but decayed wood should be removed rather than filled and hidden. New exterior-grade wood or appropriate composite trim may be installed, followed by careful caulking, priming, and painting. The trade-off is that replacement materials can reduce ongoing maintenance, while historic wood profiles may be the better choice when preserving the building’s original character matters most.
For masonry and terra-cotta cornices, loose material must be secured or removed before repairs begin. Damaged joints are repointed with compatible mortar, cracks are repaired, and replacement pieces are fabricated where necessary. The color, texture, shape, and water-shedding profile matter. An incorrect hard mortar or poorly shaped patch can damage older masonry and stand out for all the wrong reasons.
Do not overlook roofing and drainage
A cornice repair that ignores drainage is incomplete. Water often reaches the cornice because of a failing roof edge, deteriorated flashing, clogged leader, missing coping, or poor slope around a scupper. If those problems remain, the repaired cornice is still being exposed to the same moisture that caused the damage.
During the project, inspect the roof membrane near the perimeter, metal flashing, coping stones, gutters, leaders, and parapet cap. Replacing a section of flashing while the cornice is open is often more cost-effective than returning later after another leak appears. This is especially true on older Brooklyn properties where roof, masonry, and decorative trim have been repaired in separate phases over decades.
When a DIY repair is not the right call
Small interior decorative molding is one thing. Exterior cornice work at a roofline is another. DIY caulk, expanding foam, or a quick paint job can hide deterioration temporarily while allowing water and structural damage to continue behind the surface.
Property owners should leave exterior cornice repair to qualified professionals when the work involves height, falling debris, metal fabrication, masonry removal, roof flashing, suspected rot, or any section that feels loose. NYC buildings may also require sidewalk protection, permits, compliant access equipment, and coordination with facade safety requirements depending on the building and scope of work.
A reputable contractor should explain whether the work is an emergency stabilization, a targeted repair, or a full restoration. Ask what caused the failure, what materials will be used, whether related roof or masonry issues are included, and how the surrounding area will be protected during construction. Clear answers and a written scope help prevent surprise costs and incomplete repairs.
What affects the cost of cornice repair?
Cornice repair costs vary widely because access and hidden damage can matter as much as the visible opening. A small repair from a safe roof area is very different from restoring an ornate front-facade cornice that needs scaffolding, custom metalwork, masonry restoration, and pedestrian protection.
The main cost factors include the material, height, access requirements, length of the damaged area, condition of the substrate, decorative complexity, and whether roofing or facade repairs are needed at the same time. In many cases, addressing a damaged cornice early is the more affordable choice. Waiting can allow water to spread into brick, framing, plaster, insulation, and interior finishes.
Best Budget Construction approaches cornice restoration as part of the full building envelope, not as an isolated patch. That means looking at the roof edge, masonry, waterproofing, and visible facade condition before recommending a scope that fits the property and budget.
Protect the repair after the work is complete
Once repaired, an exterior cornice needs periodic attention. Check it after severe storms and at least once a year for peeling paint, open seams, rust, blocked drainage, or new cracks. Keep roof drains and leaders clear so water does not back up at the perimeter.
A fresh coat of properly specified exterior paint is not just for appearance. On metal and wood cornices, it is a protective layer that needs maintenance before the substrate is exposed again. Catching early paint failure can save a property owner from a much larger restoration project.
If your cornice is showing cracks, rust, missing pieces, or water damage, do not wait for the next storm to reveal the full problem. A professional site assessment can identify the cause, secure unsafe areas, and provide a clear repair plan before a manageable fix becomes a major facade and roofing expense.
